
Monday, 12 August 2013
Animethon 2013!
This past weekend Dark Knits had a booth at Animethon 20 in artists alley, organiser disorganization gongshows aside it was a good show for us, many positive interations with all sorts of folks, saw some absolutely incredible cosplays, and we nearly sold out! Thank you heaps much to everyone whom came out to visit us!
Dark Knits Boutique booth at Animethon 20

Wednesday, 15 May 2013
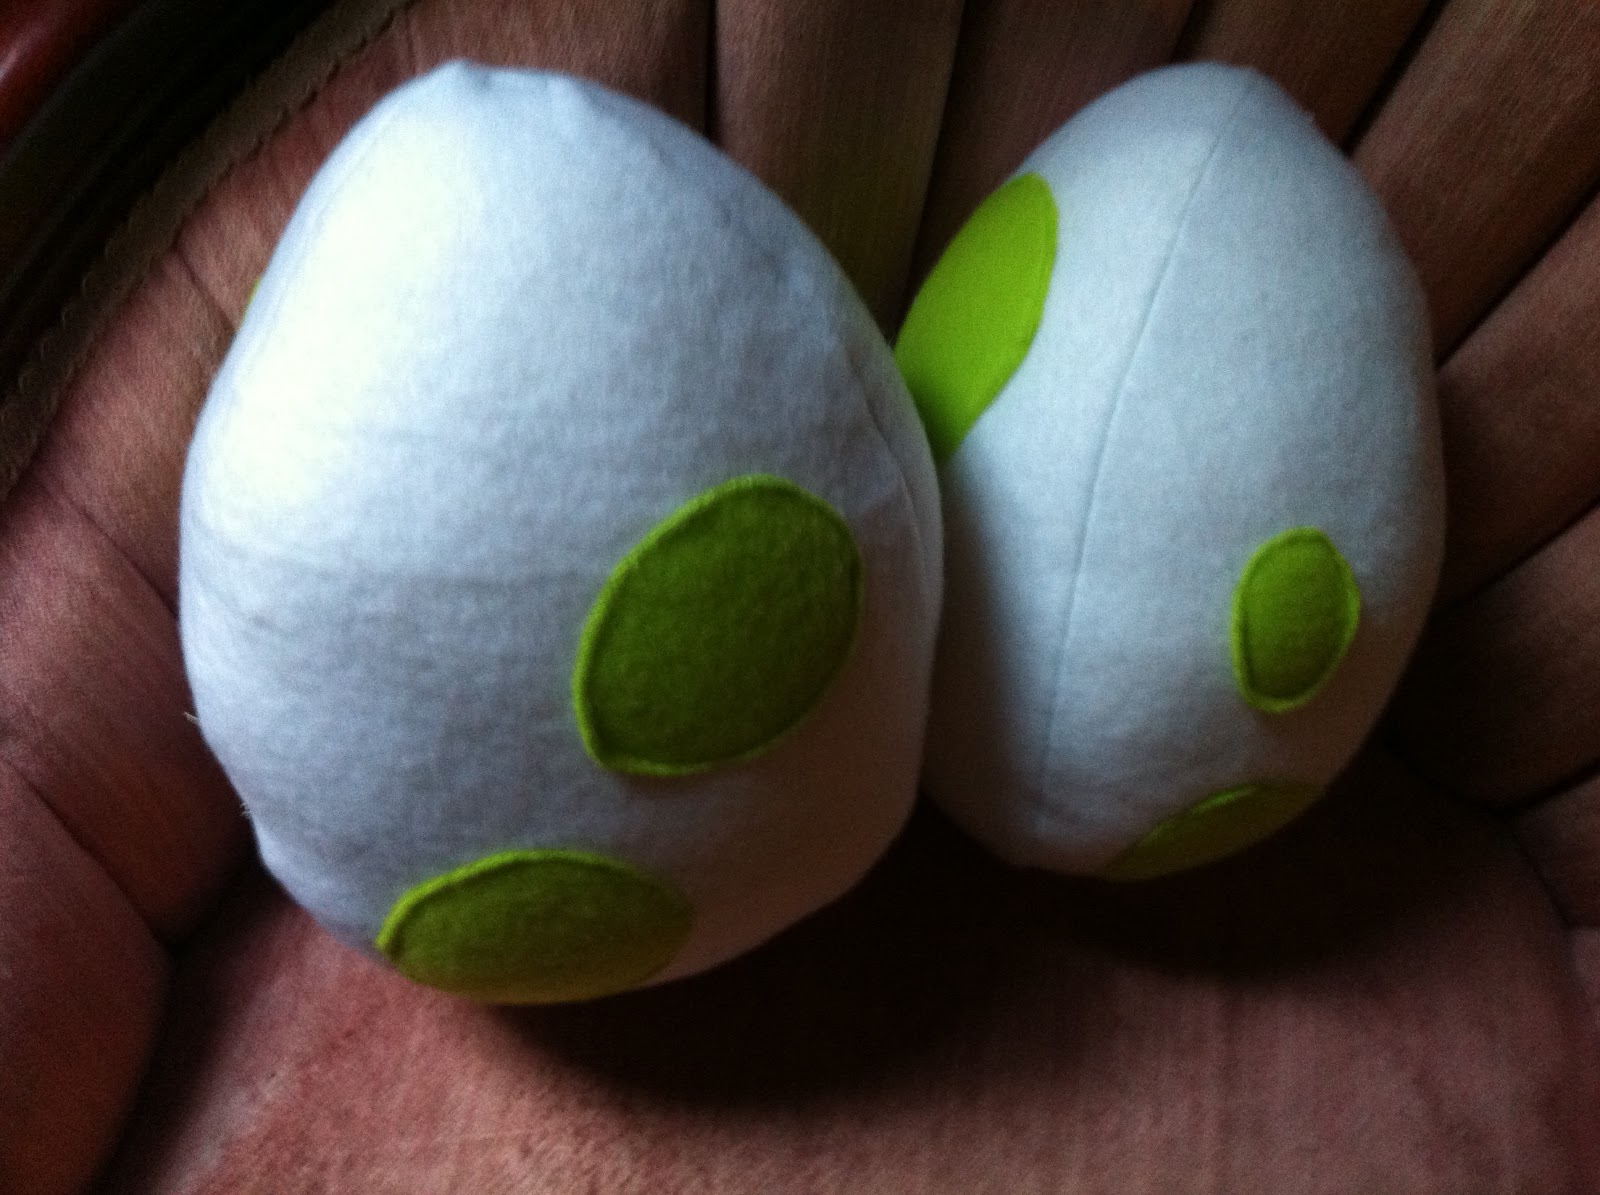
Yoshi egg stuffies!
If you are from my generation chances are Nintendo's Mario bros. series spent more time raising you than your parents did, honor those childhood memories and bring some of that pixelized geekyness to your abode by making yourself some Yoshi egg stuffies. These make great nerd gifts too- I've had threats of mass yoshi egg theft from undisclosed friends... you know who you are you douche canoes.
*I just want to make it clear that these are something I pulled out my ass for a friend (and now I have a metric shit ton of them in my geek room), they are not lisenced or endorsed by Nintendo, they are just something neat that any mental giant with a sewing machine can put together*
.JPG)
~0.5m White fleece (splurge the extra fifty cents a yard for the non pilling kind... You will thank me later when your yoshi eggs are well loved and not looking like they have some undiagnosed STD)
~0.1m Green fleece (or colour of your choice) Buy more coloured fleece if you want your eggs to have more spots, and again- don't be a cheap bastard, get the non-pilling fleece.
~A sewing machine (or a needle and thread and lots of extra time on your hands.)
~Scisors
~Stuffing of some kind- you can use all sorts of stuff for this, from scrap fabric bits to actual stuffing from the craft store... in my experience you have to stuff these suckers quite dense to hold the shape well- so your really better off buying a bag of stuffing.
.JPG)
How to:
Step 1:
Cut your fleece. You will have to cut oblong circles of varying sizes our of the coloured fleece.
As a side note, I havent been able to find out if Yoshi eggs have a specific number, size or placement pattern for the spots. Knowing the nit-picky folks at Nintendo, I would think that they do, but I havent found it.... If you manage to find it help a sister out and let me know.
You'll also have to cut out 3 'football' shaped panels out of the white fabric. (see the picture below) Make them slightly more pointed on the top and more roundy on the bottom to give an egg shape when complete.
.JPG)
Step 2:
Fire up ye-olde-sewing machine! Start by sewing the coloured spots flat onto the white football shaped panels, to keep everything looking good, keep the stitches a uniform distance away from the edge of the coloured fleece. (a couple milimeters is plenty to give it enough strength to hold the fabric down)
Step 3:
Now that you have your coloured spots attached to the white panels, its time to stitch the white panels together. I shouldnt have to say this, but put them face to face (side with coloured spots to side with coloured spots) and sew ONE of the outside edges.... not two boys and girls, unless you want the flattest yoshi eggs you've ever seen.
Step 4:
Take that third panel and do the same thing, sewing both sides, but make sure to leave yourself enough room to turn it right side out and stuff it.
Step 5:
Turn it right side out and stuff it. Shocking stuff, I know.
Step 6:
Hand stitch the hole you used to stuff it shut. Hand stitching is the devil and most people suck at it, sorry 'bout that there sunshine. Practice makes perfect!
*I just want to make it clear that these are something I pulled out my ass for a friend (and now I have a metric shit ton of them in my geek room), they are not lisenced or endorsed by Nintendo, they are just something neat that any mental giant with a sewing machine can put together*
Finished Yoshi egg stuffies
You will need: (makes two eggs- provided you dont screw up.): ~0.5m White fleece (splurge the extra fifty cents a yard for the non pilling kind... You will thank me later when your yoshi eggs are well loved and not looking like they have some undiagnosed STD)
~0.1m Green fleece (or colour of your choice) Buy more coloured fleece if you want your eggs to have more spots, and again- don't be a cheap bastard, get the non-pilling fleece.
~A sewing machine (or a needle and thread and lots of extra time on your hands.)
~Scisors
~Stuffing of some kind- you can use all sorts of stuff for this, from scrap fabric bits to actual stuffing from the craft store... in my experience you have to stuff these suckers quite dense to hold the shape well- so your really better off buying a bag of stuffing.
I buy stuffing in bulk. Seems like I always need that junk.
How to:
Step 1:
Cut your fleece. You will have to cut oblong circles of varying sizes our of the coloured fleece.
As a side note, I havent been able to find out if Yoshi eggs have a specific number, size or placement pattern for the spots. Knowing the nit-picky folks at Nintendo, I would think that they do, but I havent found it.... If you manage to find it help a sister out and let me know.
You'll also have to cut out 3 'football' shaped panels out of the white fabric. (see the picture below) Make them slightly more pointed on the top and more roundy on the bottom to give an egg shape when complete.
Step 2:
Fire up ye-olde-sewing machine! Start by sewing the coloured spots flat onto the white football shaped panels, to keep everything looking good, keep the stitches a uniform distance away from the edge of the coloured fleece. (a couple milimeters is plenty to give it enough strength to hold the fabric down)
Step 3:
Now that you have your coloured spots attached to the white panels, its time to stitch the white panels together. I shouldnt have to say this, but put them face to face (side with coloured spots to side with coloured spots) and sew ONE of the outside edges.... not two boys and girls, unless you want the flattest yoshi eggs you've ever seen.
Step 4:
Take that third panel and do the same thing, sewing both sides, but make sure to leave yourself enough room to turn it right side out and stuff it.
Step 5:
Turn it right side out and stuff it. Shocking stuff, I know.
Step 6:
Hand stitch the hole you used to stuff it shut. Hand stitching is the devil and most people suck at it, sorry 'bout that there sunshine. Practice makes perfect!
Yay finished yoshi eggs! Protect them from your klepto friends... seriously.
As always, the content displayed in this post (including the pictures!) is property of Dark Knits Boutique and may not be copied in any form without express written consent.
As always, the content displayed in this post (including the pictures!) is property of Dark Knits Boutique and may not be copied in any form without express written consent.
Thursday, 25 April 2013
Sculpting for cosplay
I often get asked TONS of questions on my cosplay costumes, especially the more elaborate ones like my sorceress Edea or the Jadis the white witch costume I recently made for a friend- most of these questions are along the lines of "how'd you make that awesome prop?!"

Sculpting boys and girls, lots of sculpting.... and often a fair amount of swearing, but hey- I have to earn that Screamstress name somewhere right?
You'll need:
Newspaper- seriously, dont skimp on the newspaper- a clean workspace is a happy workspace and this will keep it that way.
Sculpting clay- I make my own, no you may not have the recipe- it includes unicorns tears and the blood of a virgin so you probably don't really want it anyway. A good substitute to making your own sculpting clay is a product like this- it air dries with minimal cracking, is decent to sand and easy to work with... its also what I use for newbs when I teach sculpting classes in the studio.
Sandpaper-from a course grit to a fine grit, to get everything smooth as possible and prep for paint.
Paint-any kind but water colour works really. My preference is acrylic for detailed stuff to be painted by hand. If your just spraying good ol tremclad will do. What ever paint you use, make sure you get a good primer to put down a good base coat and a good clear varnish to seal it all up when done.
A cup of water- for when the clay dries out, this will be a life saver for making it workable again.
Firm wire- this isn't always needed but for more elaborate stuff with ornate sticky-outy pieces you can stuff it in there for support as a frame of sorts.
Sculpting tools- you dont need the fancy tools, toothpicks, cutlery and your hands will do.
Duct tape- youll need to make a base some how no wont you?
Foamy head form- these make good stands for helmets and head pieces.
Duct tape- youll need to make a base some how no wont you?
Foamy head form- these make good stands for helmets and head pieces.
Okay, you've got all your stuff together, now how do you make that blob of clay into a useable prop?
Theres no set procedure to sculpting- you just let your creative juices flow, but I find headpieces to be the most difficult so I'll step you through how I do that.
For a helmet type head piece such as the sorceress Edea piece, youll need a head form- dont just trust that those $3 foamy pieces of crap you get at the wig store will fit your head... you've got more crap floating around in your skull than that thing does, so I can promise you that your head is bigger. That said, the $3 foamy thing is a good stand and a place to start, although not needed. For something like the Jadis headpiece that only covers a partial part of the head you can just slap the clay on the head form and go to town.
Step 1: I start by putting some paper towel or fabric on my head and snugging it up with some tape. Yes tape... look at me being a sexy b*tch with that paper towel and tape on my head!
.JPG)
You will have no shame by the time this process is over.
Side note: If I was single this will be my dating profile picture... its a looker!
Step 2: Your going to then tape around your head in small-ish pieces (about 6-8" a piece) until the whole piece of fabric/paper towel is covered. BOOM! You have a base... with a fancy liner even! Look at you go.
.JPG)
Like a boss.... a boss with no shame what-so-ever.
Step 3: Plunk your newly finished base on your head form, and give it a trim if needed. Seriously, trim it now- you can't come back and do this later. You might also find that if you have a bulbus head like me (its all those braiiinnnss.) You'll have to pad the inside of the base to fit the form better.
In this case I had to pad the crap out of that form- I like the glass head forms for this kind of sculpting becuase they fit into my house of horrors oh so nicely, and I can pop 'em in the dishwasher when i'm done-
In this case I had to pad the crap out of that form- I like the glass head forms for this kind of sculpting becuase they fit into my house of horrors oh so nicely, and I can pop 'em in the dishwasher when i'm done-
*fun piece of advice* TAKE THE GLASS HEADS OUT OF THE DISHWASHER BEFORE THE LANDLORDS DISHWASHER REPAIR DUDE COMES OVER. Turns out they are kind of vanilla about heads in the dishwasher. who knew.
.JPG)
Step 4: Work your clay in your hands a bit to warm it up and get it workable, you might have to add a bit of water if its old clay- but be careful of adding too much or you'll have slop. Place your clay on top of the base and work it around as needed. For the Edea head piece I built the helmet/shell bit, then I made wire frames for the horns and stuck them into the not yet dry hemet and added the clay for the horns around the frame. This gives it extra strength so you dont loose a horn during a photo op or something... as amusing as that would be.
Its a good practice to put some water on your hands throughout the sculpting process, and smooth out your work. You dont HAVE to do this, but trust me- its far easier to smooth it a bit now and sand it less later. I didn't do this for the Edea helmet, and I didn't have the clay consistency just right (one of the hazards of making your own clay) so it dried rather lumpy... let me tell you, I could have taken you to the gun show after sanding that bad boy!
.JPG)
In this case for things like the shell on the right side and the disc with the pokey sticks on the left, I built them seperately, and stuck them onto the helmet semi-dry. I was however, smart enough to put little wire anchors into the hemet and matching holes into the add on pieces to make this easier for me at the glueing stage. Sometimes I have good ideas, this was one of them. *thumbs up*
.JPG)
Step 5: Let it air dry. Don't tinker with it. Don't try it on. For gods sake just let it dry and harden on its own. This generally takes at least over night, for bigger pieces your best to let it dry several days. You may notice it cracking as it dries, this is normal, the clay shrinks as it dries and even the best of us get cracks- Just take a bit of extra clay and put it in there to fill and smooth the crack and let it go back to drying. You'll have to eventually take it off the head form and let the inside dry too, nothing is grosser than putting on a head piece thats wet on the inside, yes, i'm speaking from my own impatient experience... there was girlish squealing involved.
You'll find that for horns and sticky outy stuff you will have to support it with all manner of whats-its while it air dries. Make sure its supported while drying! They will be strong enough to support themselves once dried.
.JPG)
The white witch headpiece drying.
Step 6: Sand it.... CAREFULLY. Sanding requires you put some pressure on it, but in the interests of preserving your sanity its often better to apply less pressure and have to sand for longer than breaking off a horn or something.
When sanding, start with the gritiest/roughest sandpaper first to get down all the big lumps and high spots, and work your way down to the finer sand papers to get that thing smooth as a babies bottom.
When sanding, start with the gritiest/roughest sandpaper first to get down all the big lumps and high spots, and work your way down to the finer sand papers to get that thing smooth as a babies bottom.
Helpful tip; keep the vaccum on hand to suck up all that sanding dust. Its really not fun to get that stuff in the carpet or on the cat.
Step 7: Take it outside and spray the whole thing with primer. Anything that is going to have a painted surface should be primed. ( I say take it outside becuase you are going to get a nasty cloud of overspray, you dont want to do that crap in the house. If its really cold outside allow a longer drying time.)
Yes when its primed it is going to look ugly, but its a nessecary evil... priming makes sure the paint has a good surface to stick to, your pain will apply evenly and it wont flake, crack or peel.
Step 8: Paint it as desired. If its several colours your likely stuck doing this by hand with a brush the long way. If its just one colour you can just spray it outside with tremclad spray bomb, make sure to give it a few coats as the clay will really suck it up. You can give it a weathered look by applying a darker coulour as overspray, NOT direct spray- this takes practice and some finess. Also dont do this on a windy day unless you want to eat paint. Either route you choose, always let it dry between coats.
Apply a few coats of clear spray varnish (this comes either shiney finish or matte finish) and you're all done!
Yes when its primed it is going to look ugly, but its a nessecary evil... priming makes sure the paint has a good surface to stick to, your pain will apply evenly and it wont flake, crack or peel.
Step 8: Paint it as desired. If its several colours your likely stuck doing this by hand with a brush the long way. If its just one colour you can just spray it outside with tremclad spray bomb, make sure to give it a few coats as the clay will really suck it up. You can give it a weathered look by applying a darker coulour as overspray, NOT direct spray- this takes practice and some finess. Also dont do this on a windy day unless you want to eat paint. Either route you choose, always let it dry between coats.
Apply a few coats of clear spray varnish (this comes either shiney finish or matte finish) and you're all done!
.JPG)
.JPG)
As always, the content displayed in this post (including the pictures!) is property of Dark Knits Boutique and may not be copied in any form without express written consent.
Subscribe to:
Posts (Atom)